Week10-3 Create UVs

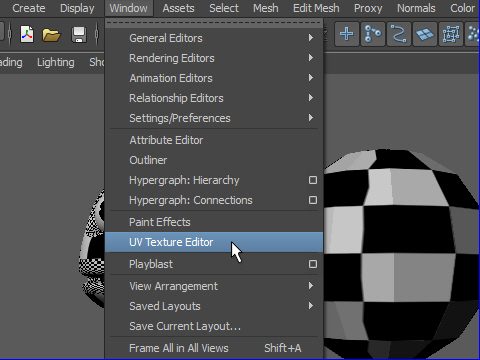
1. To apply texture evenly, first an object have to be seen in UV Texture Editor. UV Texture Editor shows flat imag of the wire frame. Then claen up the flat image of the wire frame to get correct registration of the texture.
Window > UV Texture Editor
オブジェクトのUVを調整するにはUV Texture Editorを 使います。
UV Texture Editor はオブジェクト の展開図を表示します。
Window > UV Texture Editor
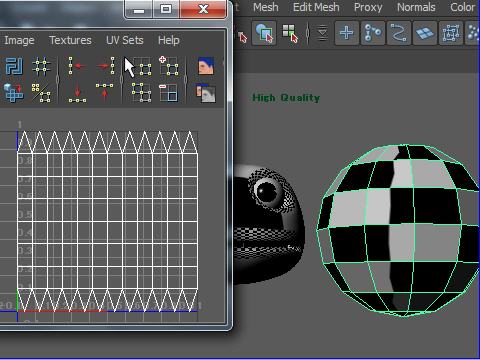
2. Apply cheker on both sphere and the character.
The chcker patern on the sphere is clean but the character is not clean.
To make character clean, UVs have to be adjusted.
Click the sphere and see the UV Texture Editor window.
This is the flat wire frame image of the sphere.
It's very clean.
球体とキャラクターにチェッカーをアプライすると 球体はきれいなパターンができますが、キャラクターはきれいなパターンができていません。これはUVに 問題があるためです。
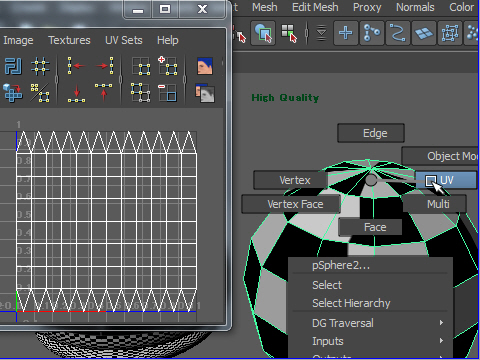
3. Press right mouse button on the sphere and go to UV mode.
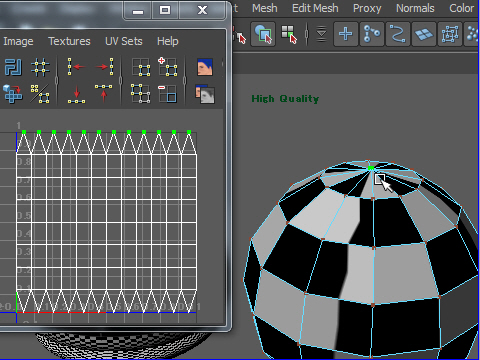
4. Select some UVs of the sphere and look at UV Texture Editor.
Primitive Geometries are clean so that you don't have to clean.
球体のUVをセレクトすると UV Texture Editor にもUVのセレクトされた状態が表示さ れます。
Maya の基本形はもともとクリーンにできているので 特に操作する必要はありません。
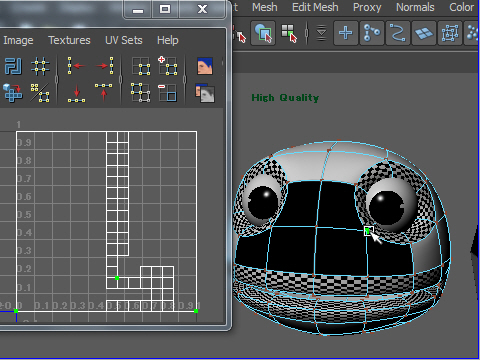
5. Now select a UV from the character.
See the UV Texture Editor.
It's unpredictable. You don't know where the eyes are or the mouth is.
It is not clean UV layout.
I am going to make a new UVs.
今度はカエルのUVをUV Texture Editor で見てみましょう。
何処に目があるのか、口があるのか、さっぱり検討がつきません。
これは面が重なり合ってたり変形しているためです。
新たにUV を作りなおしてみましょう。
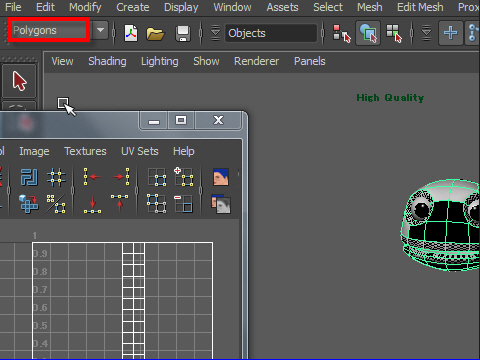
6. Change to Polygons mode.
ポリゴン モードにします。
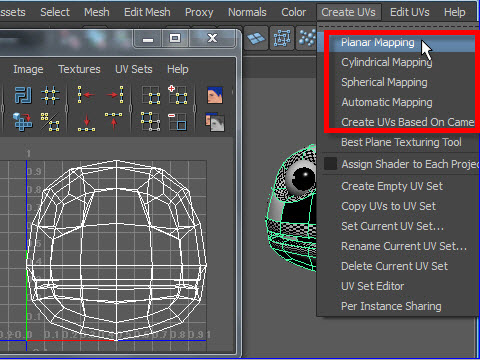
7. Go to Create UVs from the top menu.
You will find different type of UV layout.
First, try Planar Mapping.
上の図のメニューように UVを制作するにも いろいろ な角度から制作する方法があります。
まずは Planar Mapping でやってみましょう。
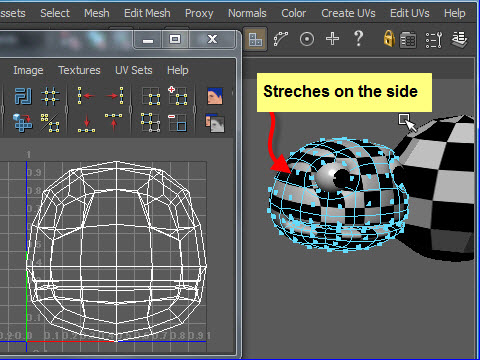
8. Planar Mapping project UVs based on the axis you choose.
If you choose Z axis, it will project from the front.
It looks goo from front view but it stretches on the side of the model.
Planar Mapping はある一定の方向から見た形を写します。
たとえばZ Axis を選択すると正面からテキスチャーをプロジェクトします。
そのため正面はクリーンですが、横はテキスチャーが伸びた状態になります。
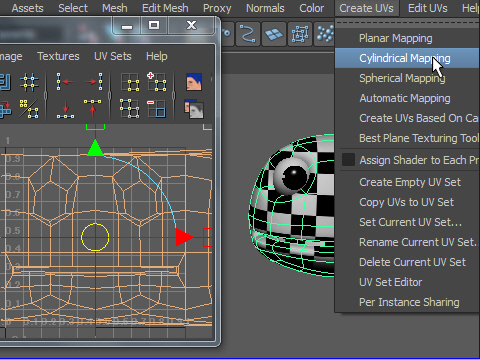
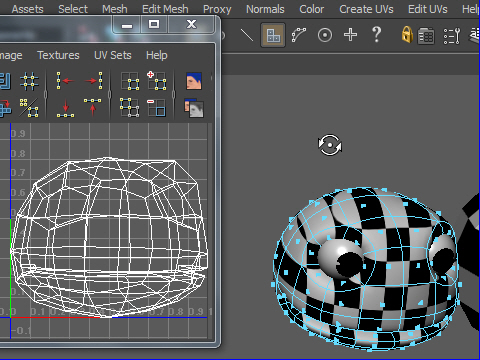
9. Select the character. Try Cylindrical Mapping.
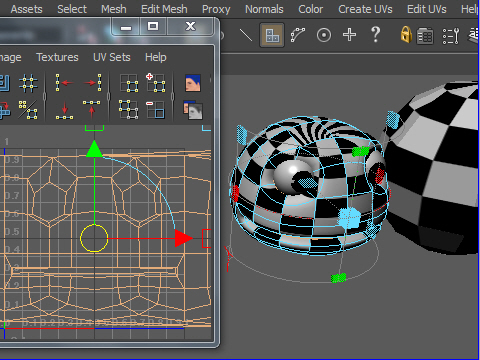
10. It warps around the object like a cylinder.
Front and side look good but top and the bottom stretchs.
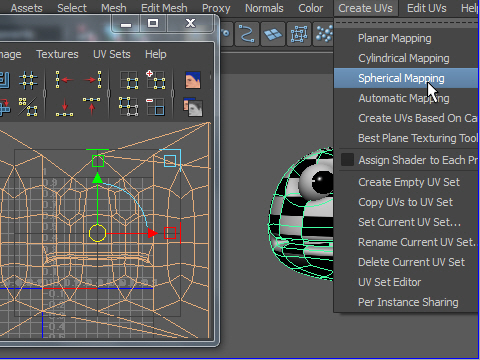
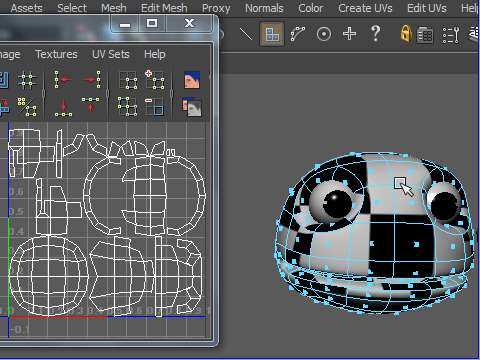
11. Spherical Mapping project like a sphere.
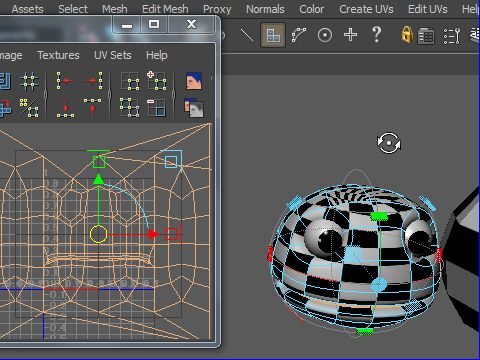
12. Front and side look good but top and the bottom stretchs.
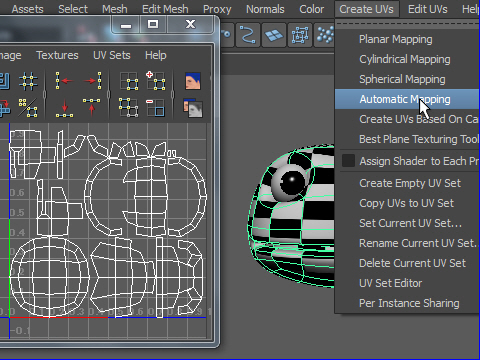
13. Automatic Mapping divide into small pieces.
14. Shapes of the checker look good but size are different and UVs are cut into small pieces. You need to stitch and organize them.
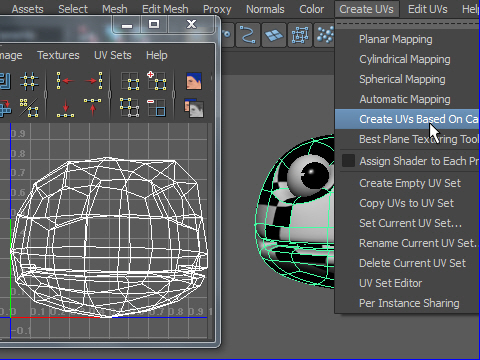
15. Try Create UV Based On Camera.
16. It project based on the camera.
In this case, Cylindrical Mapping works good.
So, I desided to use Cylindrical Mapping.
In the next page, I will show you how to clean up the UV.
-3-