| Lesson-3 |
Subsurface Scattering (サブサーフェス スキャタリング)
2 adjusting
attribute (アトリビュートの調整)  |
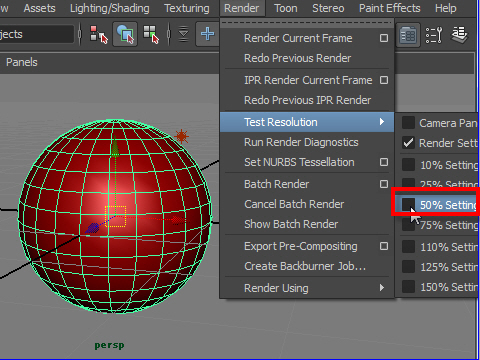
6. レンダリングを始める前にRender Setting でレンダリングのオプションを選択します。
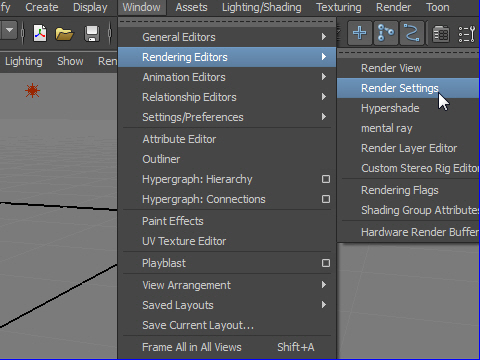
7. レンダラーはmental ray を選択します。
Quality のタブをクリックし、Quality Presets を Glonal Illumination にします。
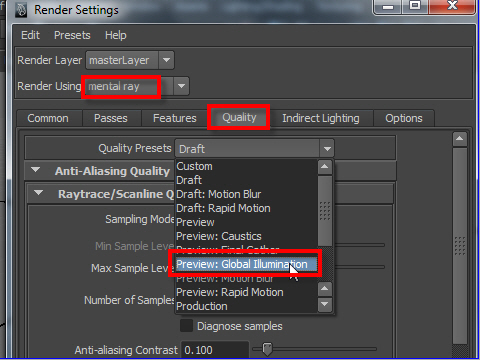
一番下のProductinに するとレンダリングの質が最もよくなり ます。
ただし、質 を上げるとレ ンダリングに時間がかかります。
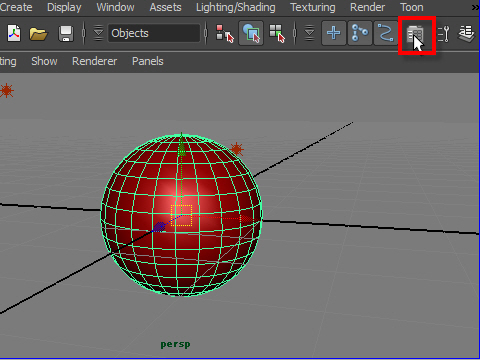
8. 球体をクリックし、画面右上にある Attribute Editor (アトリビュート エディター)のアイコンをクリックします。
9. misss_fast_simple_maya のタブをクリックします。
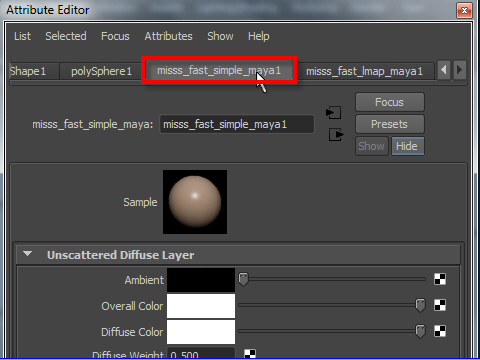
misss_fast_simple_maya のアトリビュートを調整する前に、一度 レンダリングしてみます。
10. テストレンダリングのサイズを半分にします。
サイズが大 きいとそれだ け時間がかかります。
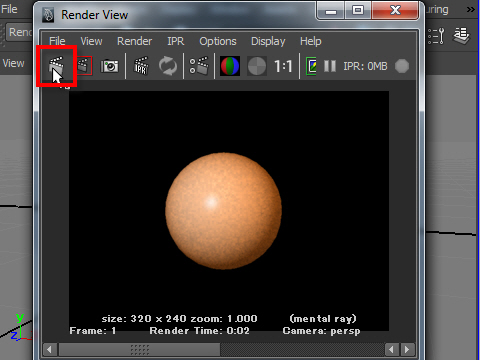
11. Render Current Frame でレンダリングします。
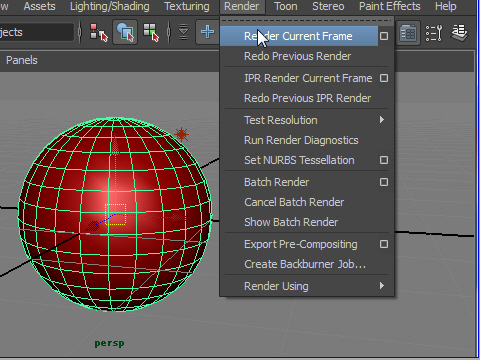
12. こんな感じです。ライトの透けた感じが少しでていますが、更なる調整が必要です。
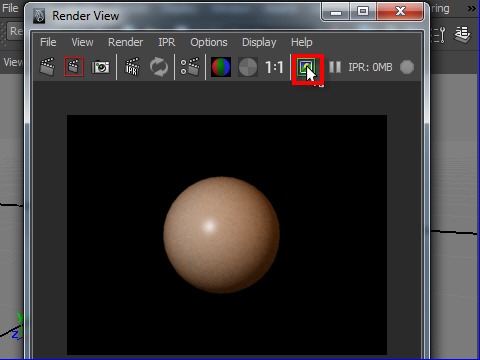
 このアイコ
ンをクリックすると イメージ
を一時的に保存することができます。これは次のレンダリングのイ
メージと比較するのに便利です。
このアイコ
ンをクリックすると イメージ
を一時的に保存することができます。これは次のレンダリングのイ
メージと比較するのに便利です。 13. Subsurface Scattering にはFront Scatter (Front SSS) と Back Scatter(Back SSS) の二種類があります。
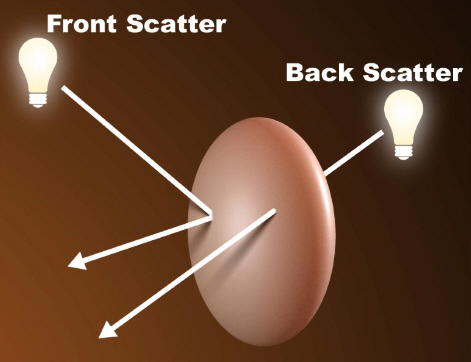
Front Scater は前から当たった光が いったんオブジェクトの中で拡散し、外に跳ね返る現象です。
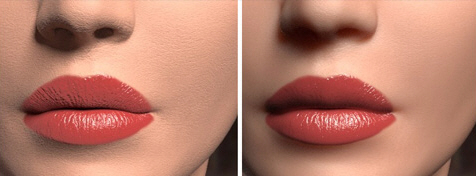
左は Front Scatter (フロント スキャッター)なし。
右は Front Scatter (フロント スキャッター)あり。
左のイメー ジは皮膚ので こぼこの影の部分が強調され、硬い感じ。
右のイメー ジは でこぼこの影の部分が薄く、みずみずしい透明感がある。
Back Scater は後ろから当たった光がオブジェクトの中で拡散し、前に通り抜ける現象です。
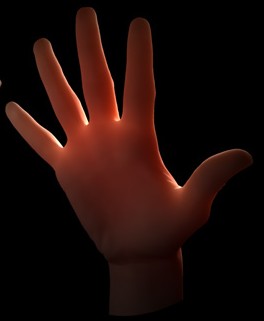
Back Scater の例
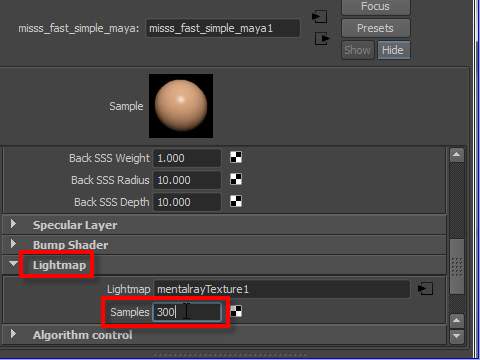
Front Scatter と Back Scatter の調整はここです。
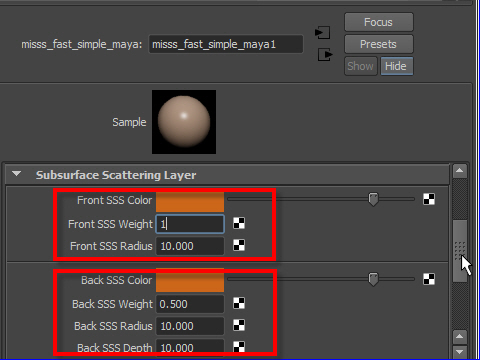
14. Weight は明るさの調整です。
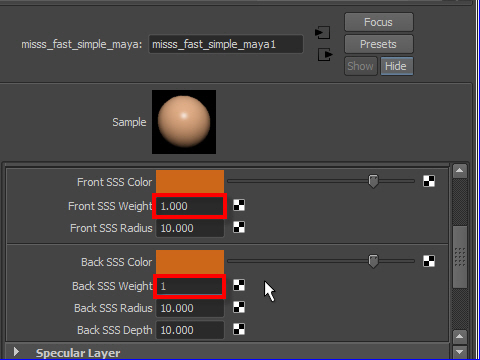
Weight を 1.0 に上げ、もう一度レンダリングしてみます。
15. Render View ウィンドウ の一番左端のアイコンをクリックするとレンダリングが実行されます。
16. Keep image ボタンをクリックして、一時的に保存します。
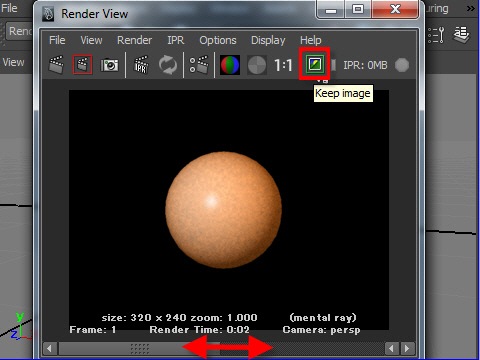
スライダー を左右に移動 して、前にレンダリングしたイメージと比較することができます。
17. レンダリングの質が よくないので Samples の数値を上げます。
18. レンダリングしてみます。
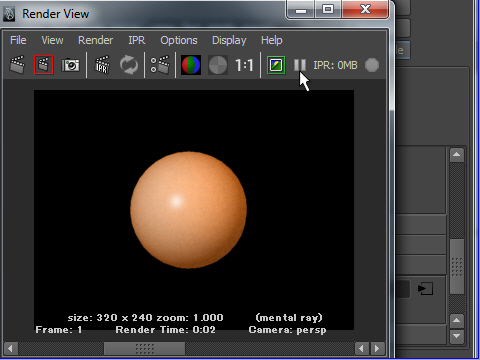
レンダリン グの質がかな りよくなりました。
19. オブジェクトの色をオレンジ色に変えてみます。
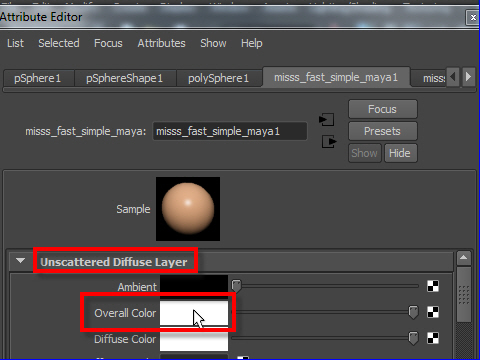
Overall Color で 全体の色を変えます。
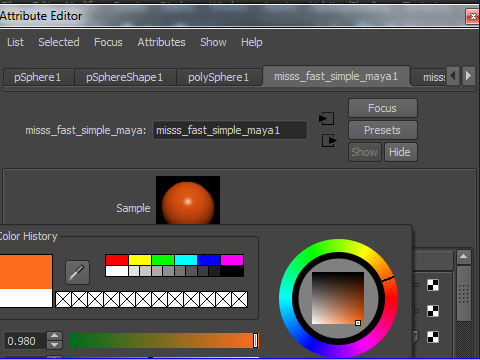
20. 色を選択します。
21. レンダリングしてみます。
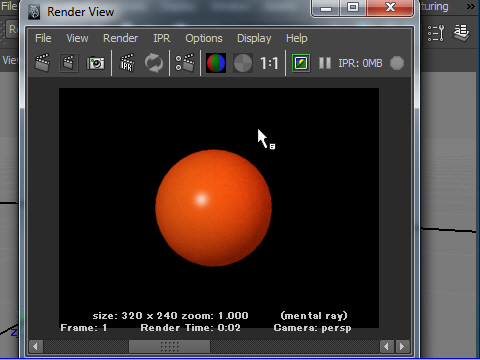
鮮やかなオレンジ色になりました。
次のページで、バンプマップを貼り付けて、でこぼこの質感をだしてみましょう。
-2-