
 2. Change the mode to Polygons on the left side of Status Bar. Modeling can be done with this set up most of the time. Status Bar の左から ポリゴンのモードに換えます。 モデリングはほとんど この設定で行います。  3. Change the shelf to Polygons. Shelf を Polygons に換えます。  4. Press the space bar to change the window. キーボードのスペースバーを押すと画面が変わります。  5. Move the cursor to the window you want to see enlarged, then press the space bar. カーソルを見たい画面に持って行き、 スペースバーを押すと その 画面が大きく表示されます。  6. Click the cube on the the Shelf. Shelfから立方体をクリック。 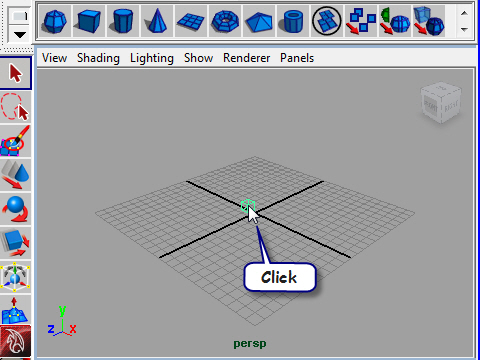 7. Click the 3D space to create the cube. 3D space をクリックして立方体を制作します。 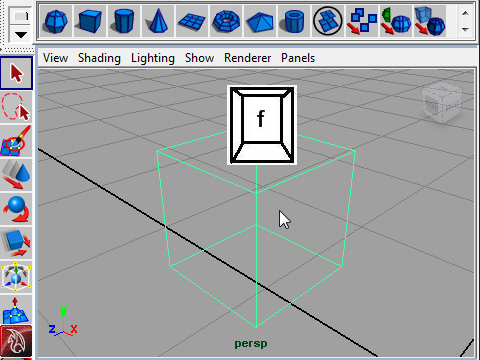 8. Press f to focus on the object. キーボードの f で焦点を合わせます。 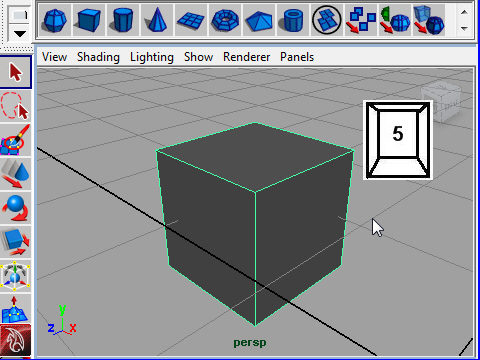 9. Press 5 for shaded objects. Press 4 for wire frame display. 5で 陰影をつけます。 4で ワイヤーフレームを表示します。  10. Alt and left mouse button for tumble. Altとマウスの左ボタンで回転。 (tumble)..... 回転  11. Alt and middle mouse button for track. (track)......カ メラを上下左右に動かすこと。  12. Alt and right mouse button for dolly. (dolly).....カ メラを前方後方に移動すること。  13. Press 4 for wire frame display. キーボードの4で ワイヤーフレーム表示。  14. Deselect the object by clicking the empty space. The wire frame turns from green to blue. Green wire frames are active mode and blue ones are inactive. You can not move or deform an object while it is inactive mode. セレクト状態を解除するには物体の外側の何もない場所をクリック。 ワイヤーの表示が緑から青に変ります。 緑の状態をactive、青の状態をinactiveといいます。 inactiveの状態では物体を移動したり、形を変えることは できません。 |