
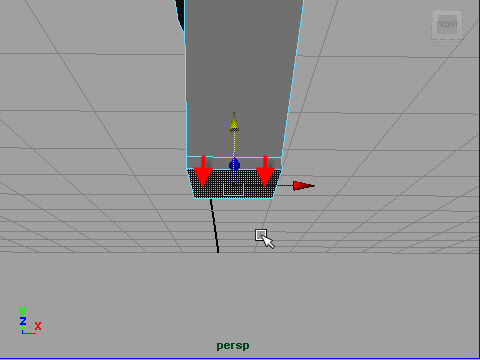
1. I am going to make the left foot.
Select the bottom face of the leg and extrude.
足を作ってみます。
底の face をextrude します。
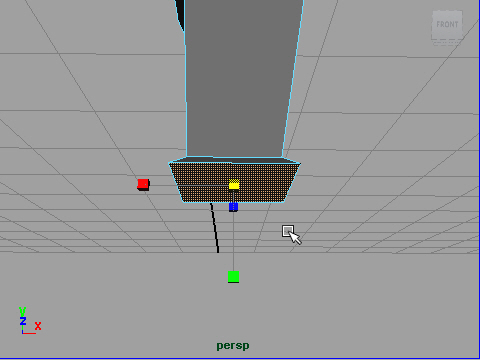
2. Scale up.
スケールアップします。
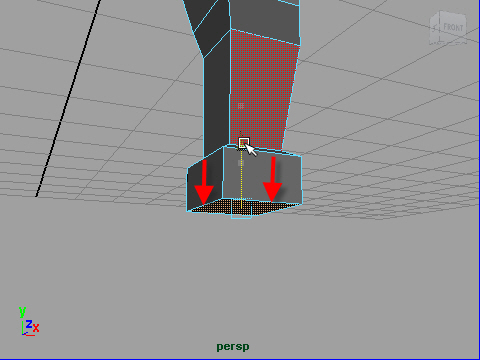
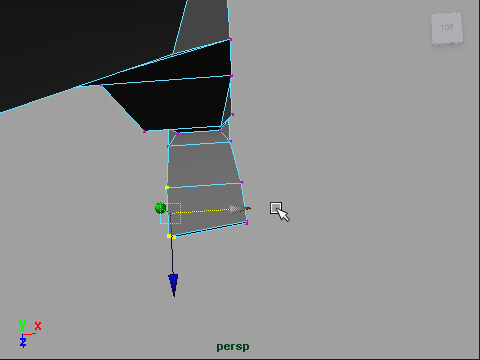
3. Extrude again.
もう一度 extrude します。
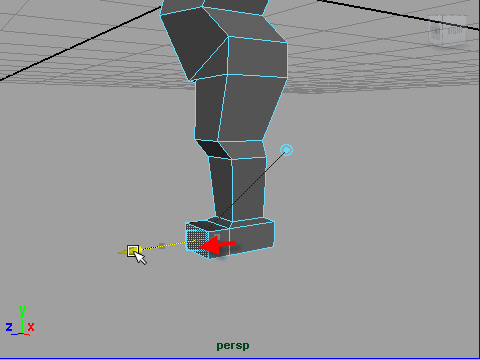
4. Extrude forward.
前方へ extrude します。

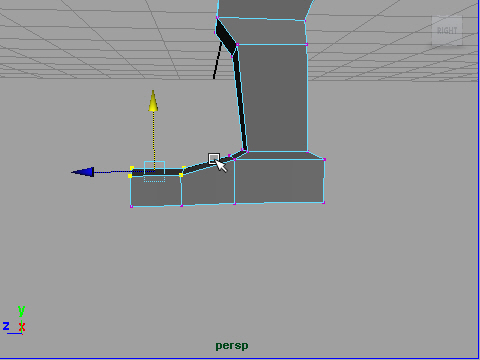
5. extrude again.
もう一度 extrude します。
6. Fix the shape.
形をととのえます。
7. Fix the shape.
指の部分は少し下げます。
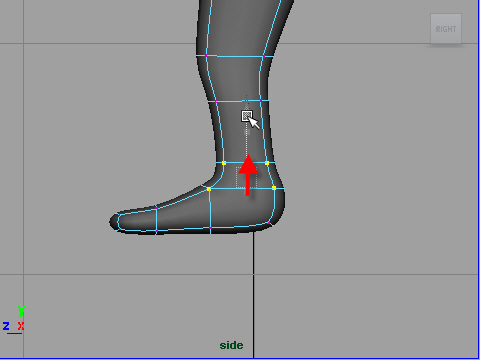
8. Fix the shape.
くるぶしの部分の高さを調整します。
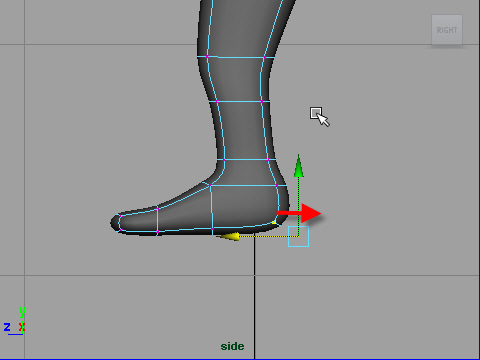
9. Fix the shape.
かかとの形を’ととのえます。
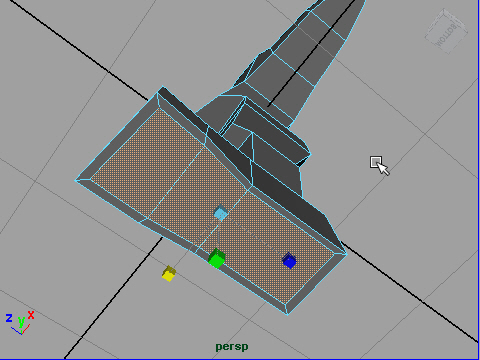
10. To make the flat bottom, extrude again and scale in like the picture above.
足の裏を平らにするには、extrude し、スケールを少し変えます。
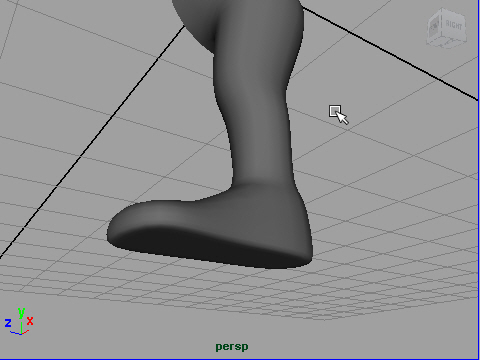
11. Check the shape with smooth display by pressing "3" on your keyboard.
キーボードの 3 を押してスムーズ ディスプレイにし形を確認します。
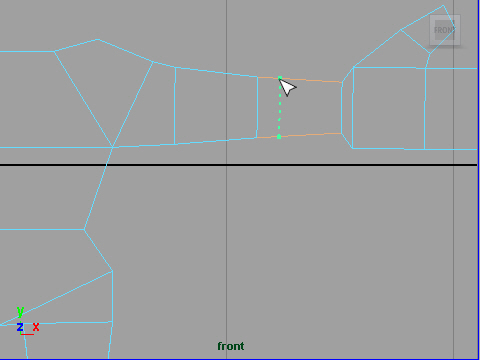
12. Insert an edgeloop on the elbow.
肘(ひじ)の部分にもう一つ edge loop を追加します。
メッシュの編集 > エッジループの挿入ツール
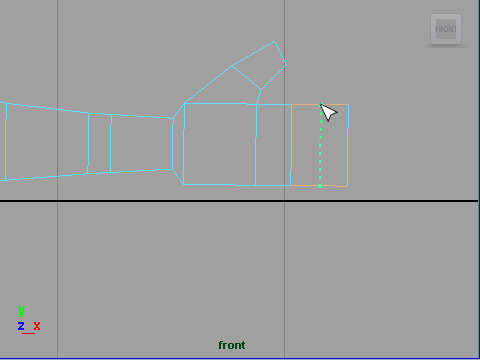
13. Insert two edgeloops on the finger area.
指の部分にも二つ追加します。
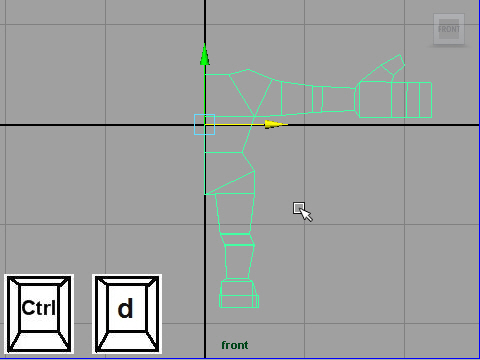
14. You can use the mirror tool to make the other side but I will show you another way to flip the object.
First, duplicate the object.
左の部分が完成しました。右側は Mirror tool でも制作できますが、
Mesh > Mirror Geometry ( メッシュ > ジオメトリのミラー )
ここでは他の方法で右側を制作してみましょう。
まずオブジェクトをコピーします。
Edit > Duplicate
キーボードの Ctr と d でもコピーできます。
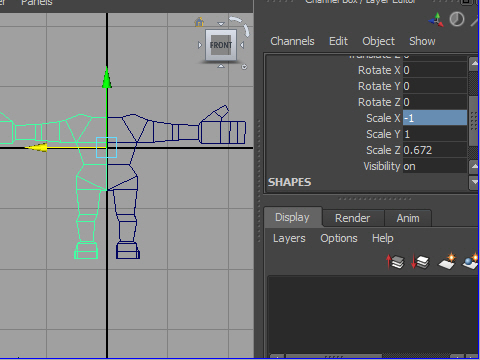
15. Scale -1 on X.
チャンネルボックスからScale X を-1 にします。
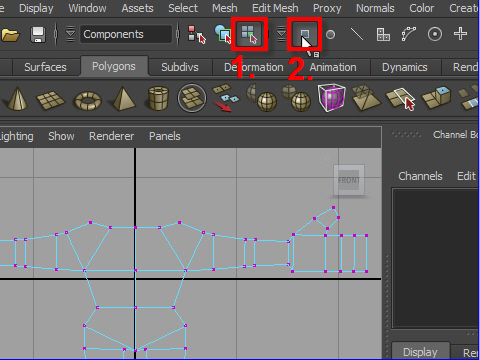
16. Select both left and right objects.
Go to Status Bar and select component icon then select vertex icon.
This is how you select the vertices if you want to work on the two objects at the same time. Marking menu doesn't work.
右と左、両方をセレクトします。
次に上の Status Bar (ステータスバー) からコンポーネントアイコンをセレクトします。そしてその横にあるバーテックスアイコンをセレクトします。
二つ以上のオブジェクトから同時に vertices を移動したい時はこの方法で制作します。 右マウスボタンを押してマーキングメニューを使う方法では制作できません。
17. Select the center vertices then scale down on X few times to make the vertices closer as possible as you can.
真ん中の vertices をセレクトしX方向に数回スケールダウンします。
vertices をできるだけ近づけるためです。

18. Combine two objects.
Now two objects became one object but the seam is not attached yet.
Next I am going to use Marge tool to attach the seam.
二つのオブジェクトをcombine (コンバイン) します。
Mesh > Combine (メッシュ > 結合)
これで二つのオブジェクトが一つになりました。
でもまだ中央の vertices は一つにアッタチされていません。
アタッチするにはMerge tool を使います。
Edit Mesh > Merge (メッシュの編集 > マージ)
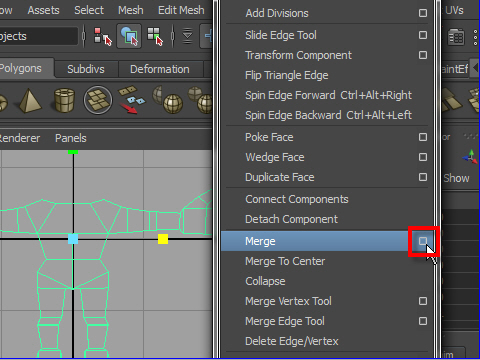
19. Go to Edit Mesh > Merge > option box
Edit Mesh > Merge (メッシュの編集 > マージ) へ行きます。

20. Put small number on the Threshold like 0.001
If the vertices distance is smaller than 0.001, vertices will merge.
Since the vertices on the seam is very cross, small number will work.
If you try big number, other vertices will merge too.
You can try big number and see the result.
Threshold に0.001 と小さな数値を入力します。
これは vertices の距離が 0.001 以下だと vertices がアッタチされて一つになるということです。
つなぎ目の vertices の距離はほとんど0 に近いのでこ のようにThreshold に小さな数値を入力します。
もしこの数値が大きすぎると他の vertices までアタッチしてしまいます。
大きな数値を入力して試してみましょう。
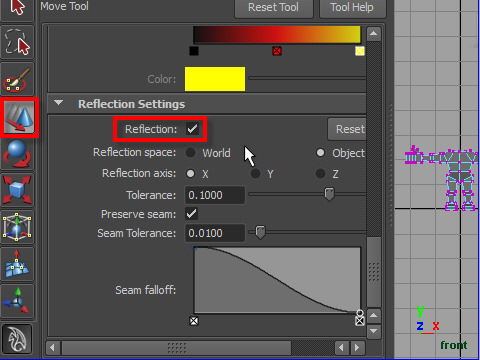
21. I am going to fix the arms. Since the object is symmetric, Reflection tool is useful to fix both right and left at the same time.
Double click move tool icon to open the attribute editor.
Check on the Reflection.
腕を左右対称に修正してみます。
左の move tool アイコンをダブルクリックしてattribute editor をオープンします。
次にReflection にチェクを入れます。
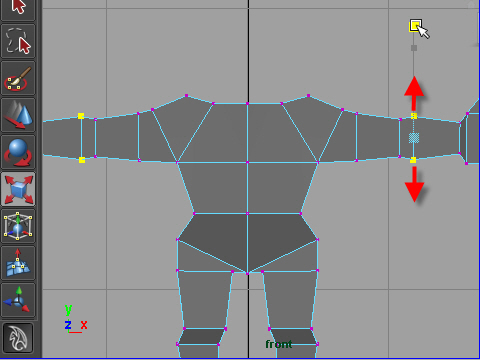
22. Move forearm bigger than the elbow.
腕の形をととのえます。

23. Check with smooth display by pressing 3 on the keyboard.
完成です。キーボードの 3 でスムーズディスプレイにします。
-3-