
1. I am going to attach the joints to the skin.
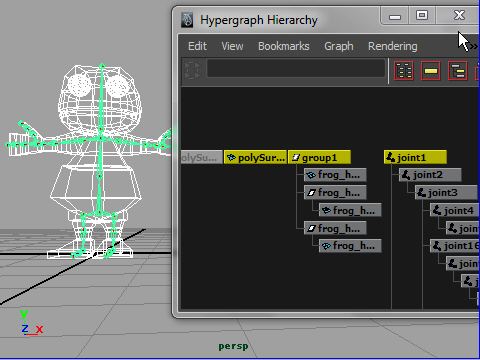
Select the top nodes of the all object and joints.
ジョイントをスキンにアタッチする方法を説明します。
まず最初にオブジェクトとジョイントのトップノード(グループの一番上)をセレクトします。
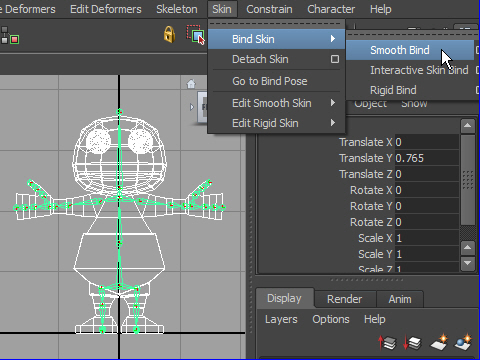
2. Go to Skin > Bind Skin > Smooth Bind
3. Select the arm joint.
腕のジョイントをセレクトします。
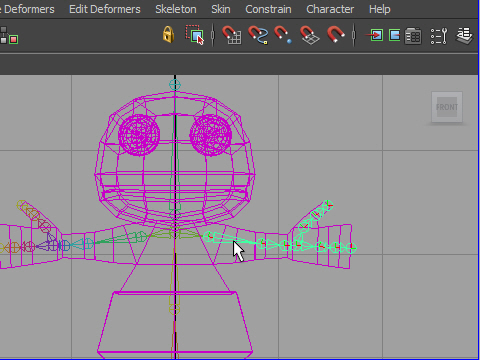
4. Rotate the joint.
The Skin is attached but it is not clean.
It need to be cleaned up.
ジョイントを回転してみましょう。
スキンがアタッチされてますがクリーンな動きではありません。
次に動きをクリーンにする方法を説明します。
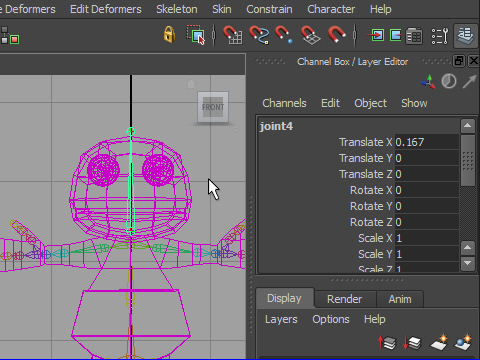
5. First I am going to clean up the head.
Select the head joint and check the joint name from the Channel Box.
In this case, the joint name is joint4 .
最初に頭のジョイント をセレクトします。
チャンネル ボックスから ジョイント名を確認します。
この例の場合は joint4 です。
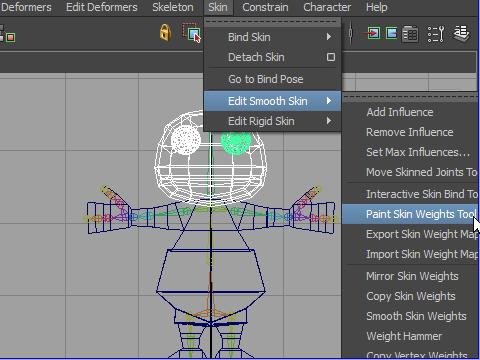
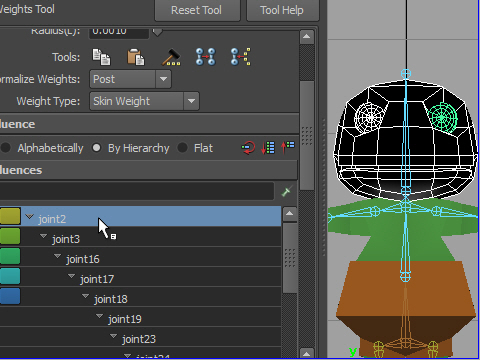
6. Now select the head and eyeballs.
Go to Skin > Edit Smooth Skin > Paint Skin Weights Tool
joint4 のセレクションを解除して 今度は頭と目をセレクトします。
次に Skin > Edit Smooth Skin > Paint Skin Weights Tool
へ行きます。
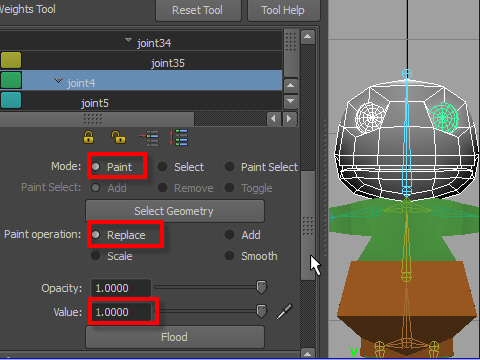
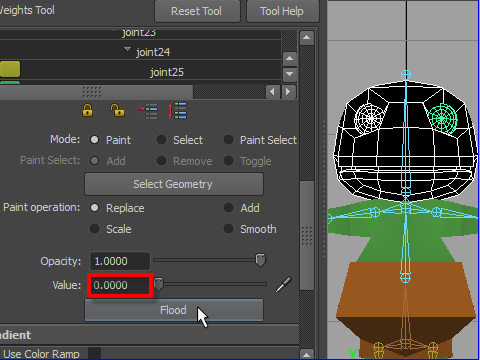
7. In attribute editor, select the options like the picture above.
Attribute editor(アトリビュート エディター)から上の例のように設定します。
8. Select the joint4 which is the head joint.
Press the Flood button to replace all at once.
If the value is 1.0 , the object become white which means the selected joint is connected to the skin 100%.
joint4 をセレクトします。joint4は頭のジョイントです。
Flood ボタンを押すと 一度に全部色が変わります。
Valueが1.0 だとオブジェクトは完全に白くなります。これはジョイントがオブジェクトに完全にアッタチされたということです。
9. Go to other joints.
他のジョイントに行きます。
10. Change the value to 0
Then press flood. The object become black which means the selected joint is not attached to the skin at all.
Clean up all joints. Turn the value to 0 except joint4 which is the head joint.
The value of joint4 should be 1.0
今度はValue を0にして Flood ボタンを押します。
オブジェクトが黒くなります。これは セレクトされたジョイントがオブジェクトに対して まったく影響してないということです。
頭のジョイントであるjoint4 以外はすべてValue を0に します。
-1-