Week3-1 Blocking Tower


1. I will explain other modeling tools while I am making Disney Castle.
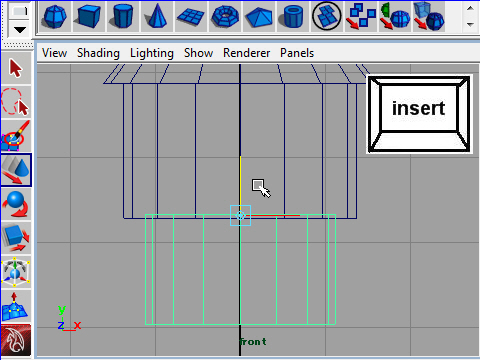
First, I am going to make the tower on the left side of the screen.
他のモディングのツールはディズニーキャッスルを制作しながら説明します。
最初に画面左側の塔を作ってみます。
2. Create a cylinder.
円柱を制作します。
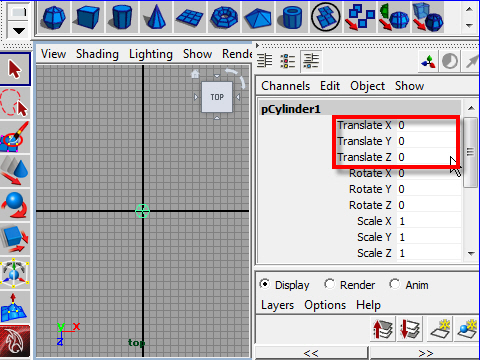
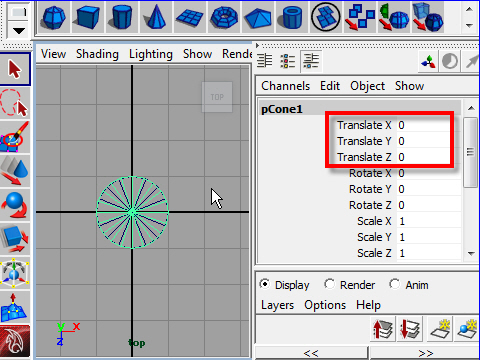
3. To move the object in the center,
type 0 on the Translate X, Y, Z. in the Channel Box,
オブジェクトを真ん中に移動します。
チャンネルボックスのTranslate X, Y, Z に0 を入力します。
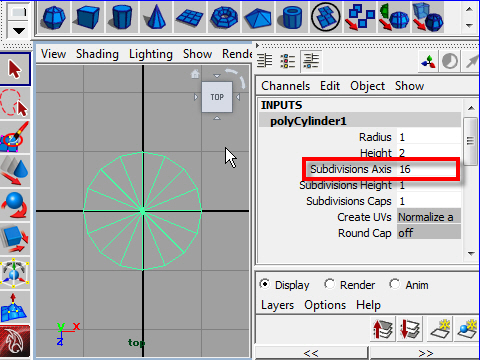
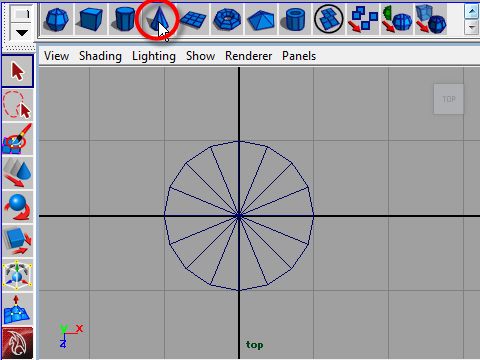
4. Click polyCylinder under INPUTS to open the details.
Type 16 on Subdivision Axis.
INPUS の下のpolyCylinderを クリックし、詳細をオープンします。
Subdivision Axis に16 を入力します。
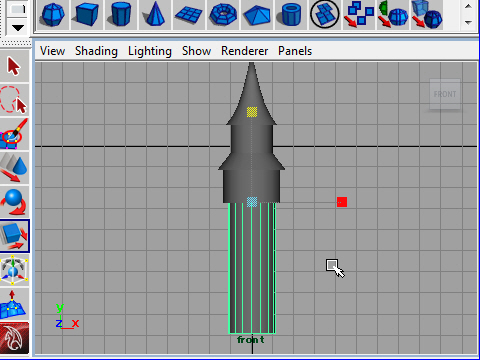
5. To make a triangle roof, create cone.
三角屋根は円すいで制作。
6. Bring to the center.
チャンネルボックスに0を 入力し、中央に移動します。
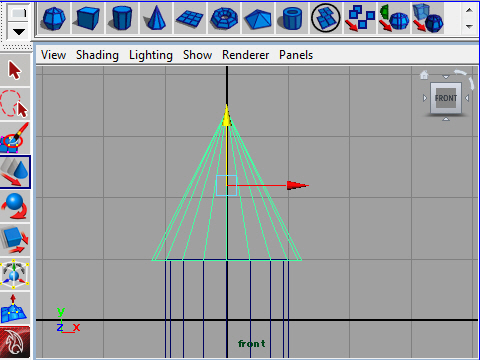
7. Move to the top of the cylinder.
円柱の上にもって行きます。
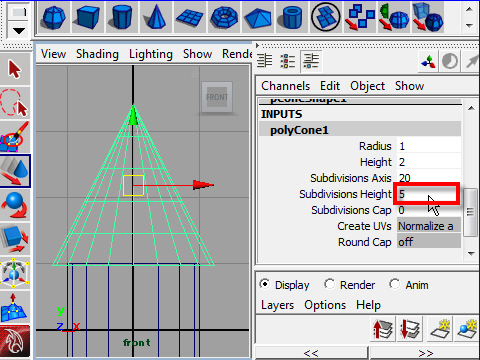
8. To make a curved roof, I want to add some edges and deform.
Click polyCone under INPUTS to open the details.
Type 5 on Subdivisions Height.
屋根に曲線をつけるために、edge を追加します。
INPUTS の下の polyCone をクリックし、詳細を オープンします。
Subdivisions Height に5 を入力します。
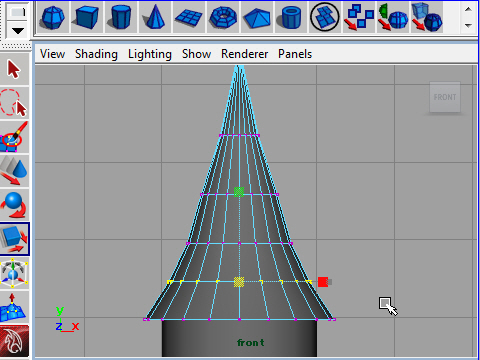
9. Make a curved roof by scaling the vertices.
バーテックスのスケールを変え曲面を制作します。
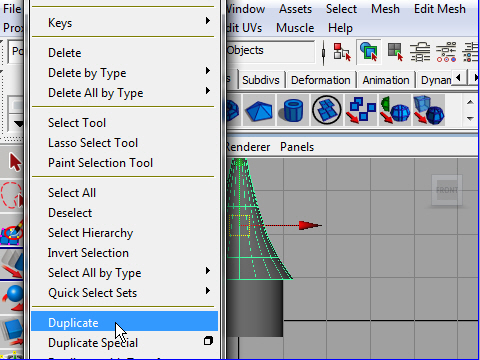
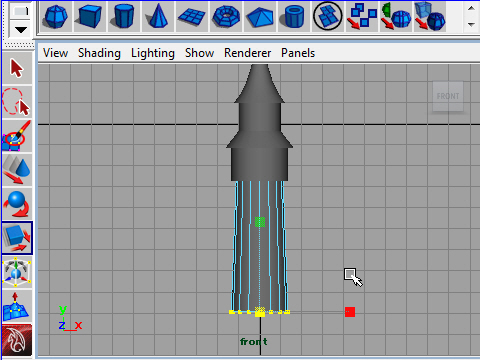
10. There is another roof below, so I am going to copy the roof and move down.
Edit > Duplicate
屋根をコピーし、もう一つ下の屋根を制作します。
11. Move down the roof.
屋根を下に移動します。
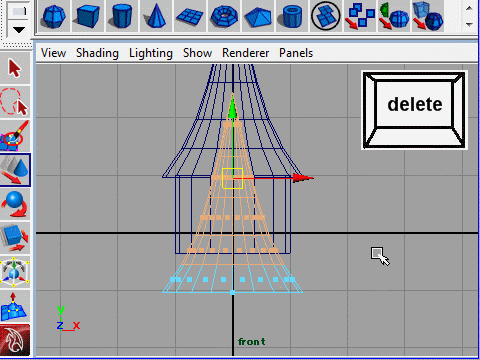
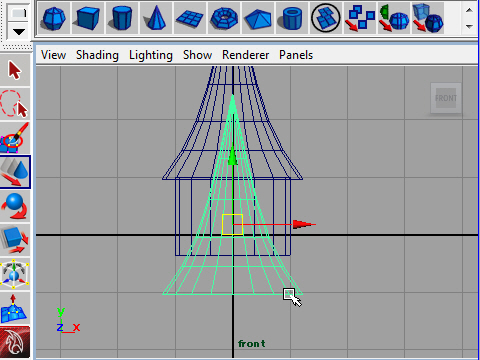
12. Delete all faces except the bottom row.
下の部分の フェイス だけ残し、あとは消去します。
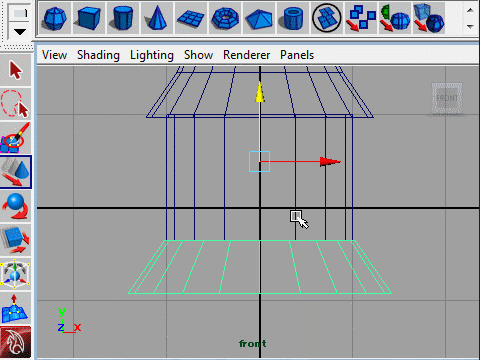
13. It's better to move the axis ( Pivot Point ) to the center of the object.
Moving the pivot point on the center makes easy to scale and rotate the object.
軸をオブジェクトの真ん中に置くと、スケールを変えたり、回転させるのが容易になります。
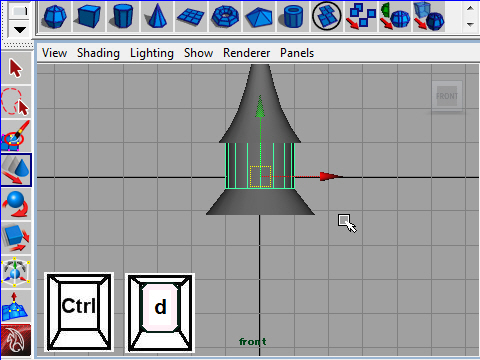
14. Duplicate the sylinder and move down .
Instead of going to the top menu to duplicate, use short cut by pressing
Ctrl + D on the keyboard.
円柱をコピーし、下へ移動します。
上のメニューからコピーするかわりに、キーボードのCtrl とd を押してコピーする方法もあります。
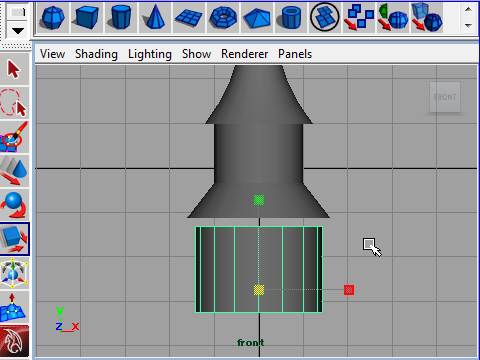
15. Adjust the size.
大きさを調整します。
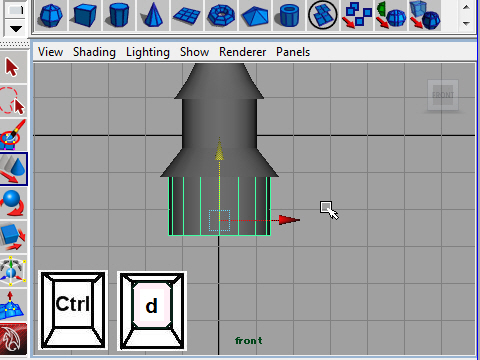
16. Duplicate another one.
もうひとつコピーします。
17. Move down the new object.
下に移動します。
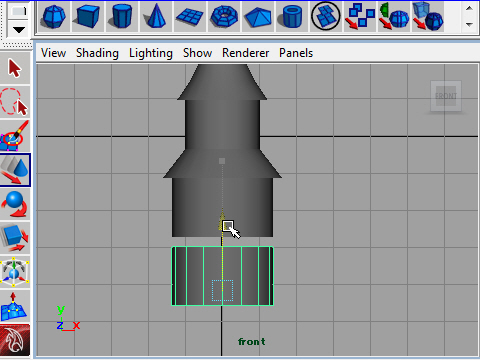
18. Move the pivot on the top of the object.
ピボットポイントをオブジェクトの上にもっていきます。
19. Scale down the object.
オブジェクトのスケールをY方向に変えます
20. Scale the bottom vertices a little.
底のバーテックスをセレクトし少しスケールを変えます。
-1-