Week4-4 Combine

1. Let's make windows.
First, select the object to put windows, then hide all unselected object by pressing Alt and h.
窓 を作ってみましょう。
窓を付けるオブジェクトをセレクトし、それ以外をAlt と h で隠します。

2. We don't need the top and the bottom faces.
Select the faces and delete them.
上と底の面は必要ないので delete します。
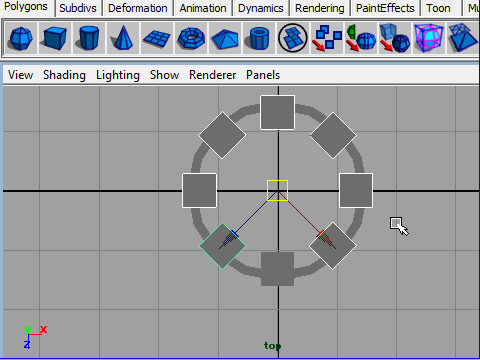
3. Create a cube and place like the example above.
Cube を制作し、図のように真ん中の正面あたりに移動します。
4. Delete the front and the back faces.
前と後ろの面はdelete します。
5. To move the object to the center, in the Channel Box, type 0 on Translate X
オブジェクトをグリッドの真ん中にもっていきたいので、チャンネルボックスの Translate X に0 を入力します。
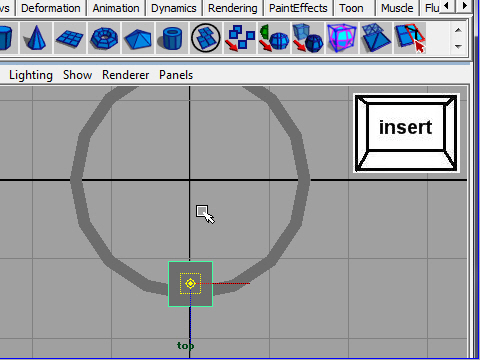
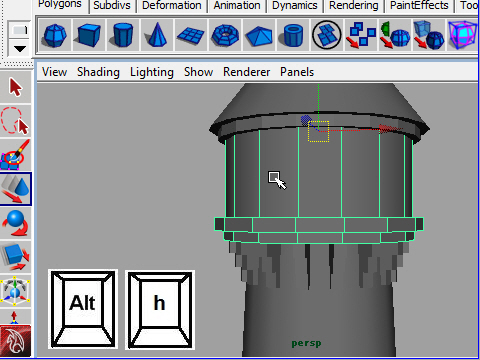
6. Press insert to move the pivot point.
塔の周りに八個 窓を作ってみます。
まずinsert ボタンで pivot point を移動します。
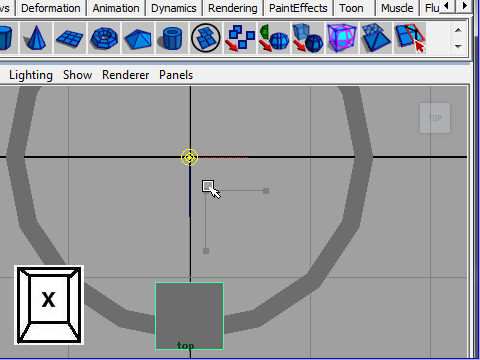
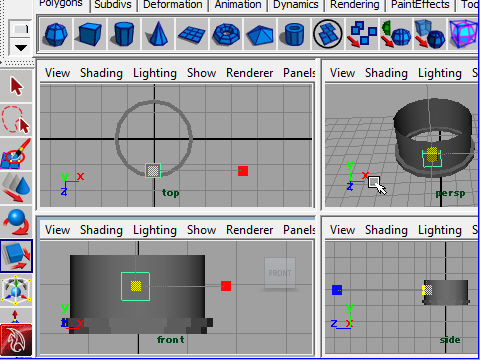
7. Press X to snap on to the center of the grid.
x でグリッドの中心に持っていきます。
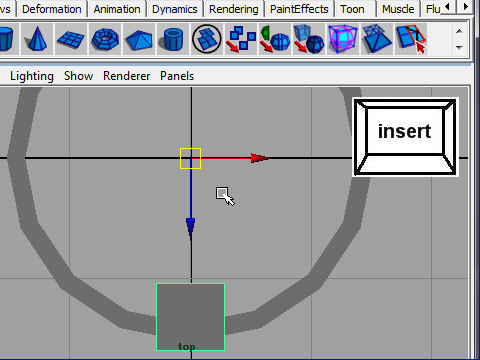
8. Make sure press insert again after moving the pivot point.
pivot point を移動した後はもう一度 inseert ボタンを押してもとの状態に戻します。

9. Go to Edit > Duplicate Special > option
Edit > Duplicate Special > option へ行きます。
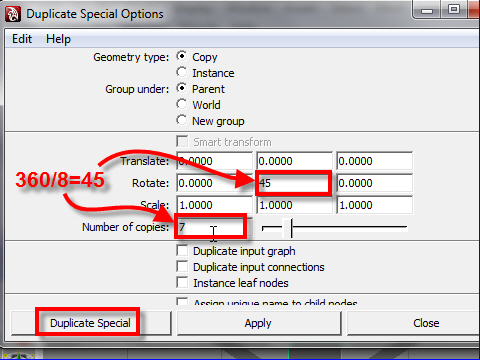
10. Type 7 on Number of copies.
Type 45 on Rotate Y. (360/8=45 degrees)
Then click Duplicate Special.
窓は八個ですが、すでに一個はあるのであと 七個必 要です。Number of copies の欄に 7と 入力します。
角度は 360/8=45 なのでRotate Y の欄に 45 を入力します。
11. Now I have 8 pieces of boxes around the tower.
箱が 45 度回転し、7個コピーされて図のようになりました。
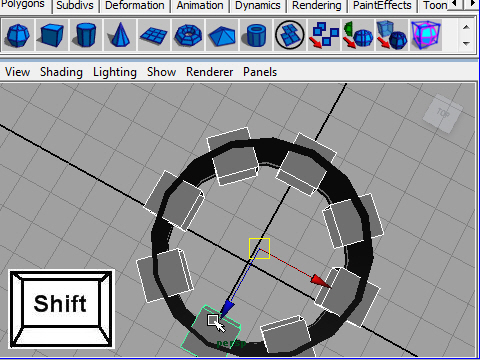
12. I am going to use Boolean to trim the box for the windows.
Before use boolean, all boxes have to be converted to one object.
First, select all boxes by pressing Shift key.
Boolean を使って箱の飛び出ている余計な部分をカットします。
その前に八個の箱を一つにまとめるとBoolean が簡単にできます。
(一つにまとめないと、Boolean を八回実行することになります。)
一つにまとめるには、まずShift を使って箱を八個セレクトします。
13. Next, go to Mesh > Combine.
Now eight objects became one.
次に Mesh > Combineで一つのオブジェクトにし ます。
(先週説明した Edit > Group とは違います。)

14. Select the body first then select the boxes.
Boolean を実行するにはまず 胴をセレクトし次に箱をセレクトします。
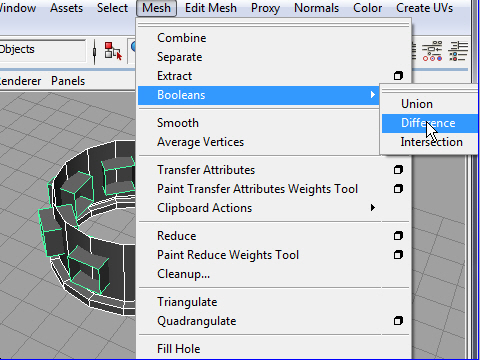
15. Aply Boolean.
Mesh > Booleans > Difference
Boolean を実行します。
Mesh > Booleans > Difference
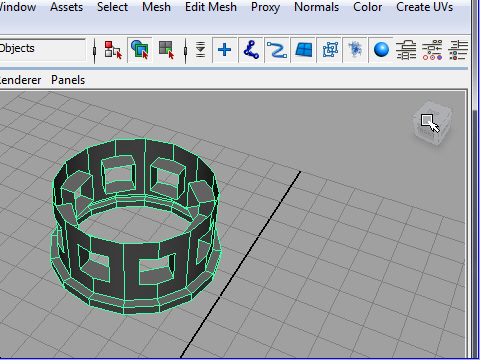
16. The boxes are trimed.
箱がtrim(切り落とされ)ました。
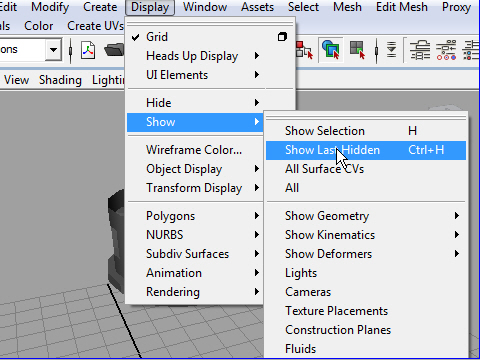
17. Show hiden objects.
最後に隠したオブジェクトを表示します。
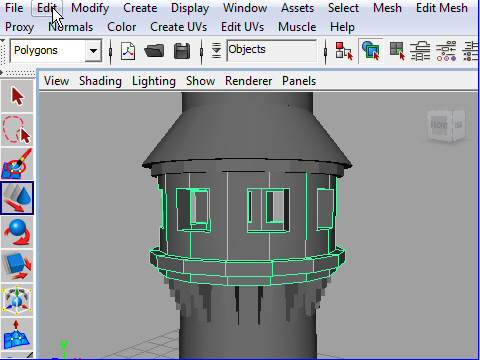
18. Each time when you use some tools, Maya create construction history which makes a file heavy. Since we don't need construction history, it is better to delete it.
いろいろなツールを使うたびに Maya はその情報 (history) を記憶していきます。
そしてどんどんデーターが大きくなっていきます。
今の時点ではそのデーターは必要ないので消去します。
消去するには、まずオブジェクトをセレクトし、
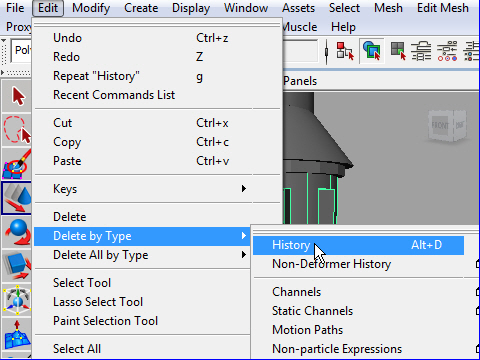
19. To delete the history, select the object
then go to Edit > Delete by Type > History
Edit > Delete by Type > History でHistory を消去します。
-4-