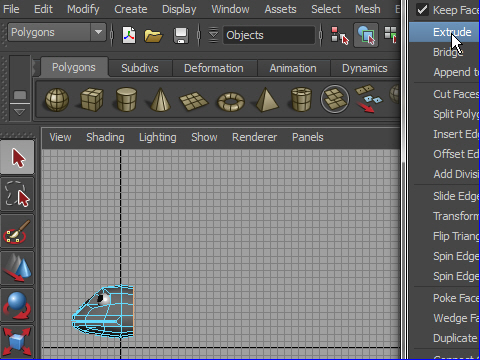
1. I am going to extrude the body.
Select the border edges and scale Z to make them straight.
See the picture above.
extrude して蛇の胴の部分を作ってみます。
ボーダーのエッジをセレクトしZ方向にスケールしエッジをストレートにします。
2. Extrude the edges.
Extrude します。
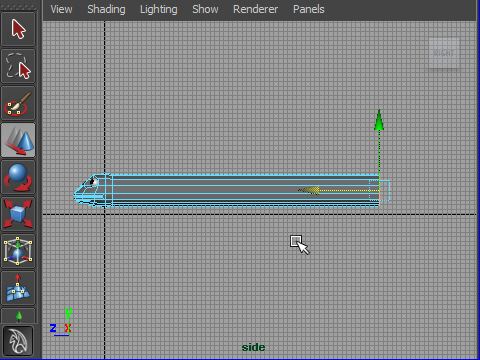
3. Extend the edges.
エッジを移動し長さを決めます。
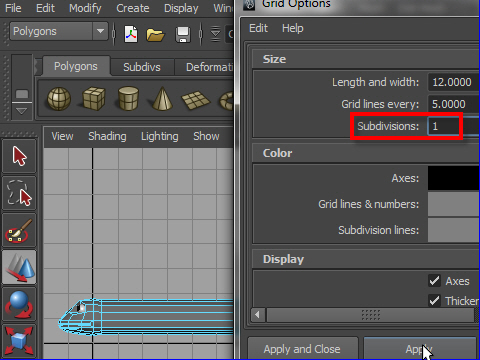
4. The grid is too dense, so I am going to change the grid size.
Go to Display > Grid > option box
In option box type 1 on Subdivisions.
ここでちょっと グラフのます目が小さいので大きくします。
Display > Grid > option box へ行き、Subdivisions に1 を入力します。
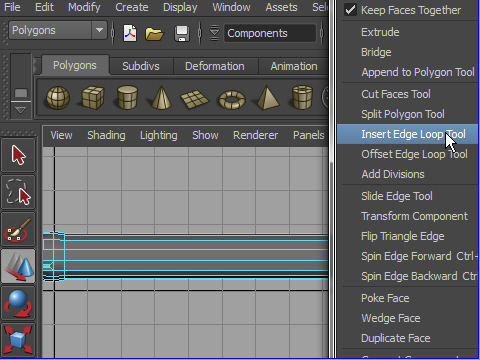
5. Insert some edge loops on the body.
Edit Mesh > Insert Edge Loop Tool
胴の部分に Insert Edge Loop Tool で エッジを追加します。
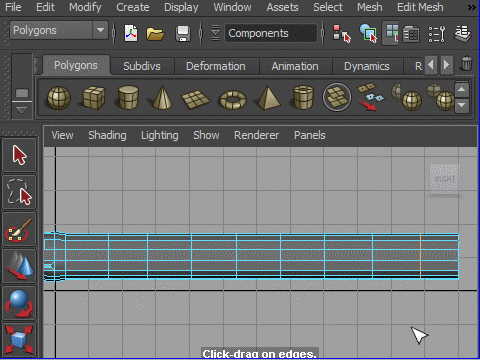
6. Make sure after finishing Insert Edge Loop Tool, exit the tool mode by pressing the icon on the top left side.
エッジを追加した後に左上のアイコンをクリックし Insert Edge Loop Tool を終了します。
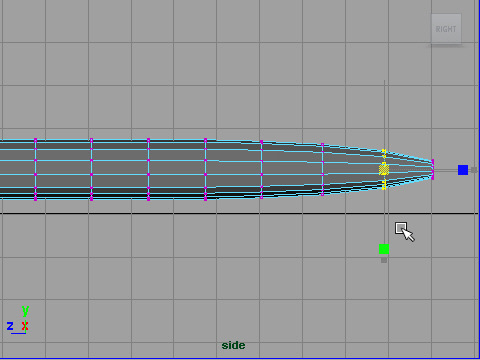
7. Taper down toward the tail by changing scale.
しっぽの部分のスケールを変え、細くします。
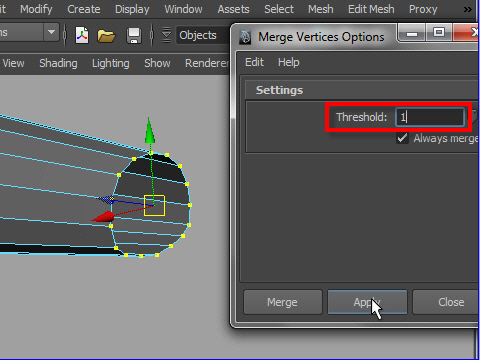
8. To connect vertices, use Merge Tool.
Edit Mesh > Merge
Make sure to adjust the Threshold. If the number is too small, increase the number.
Merge Tool でバーテックスを一つにします。
Edit Mesh > Merge(マージ)
Threshold の数値が小さいとマージしません。
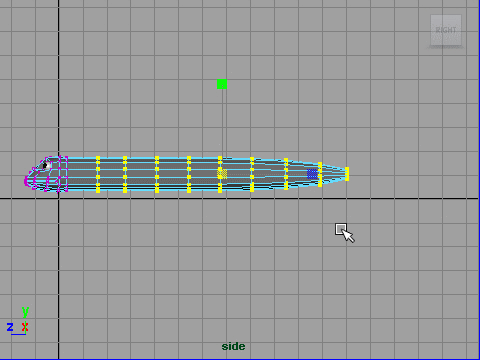
9. To make the body longer, select the vertices and change scale on Z.
See the example above.
胴の部分を長くするにはバーテックスのスケールを変えます。
動画を参考。
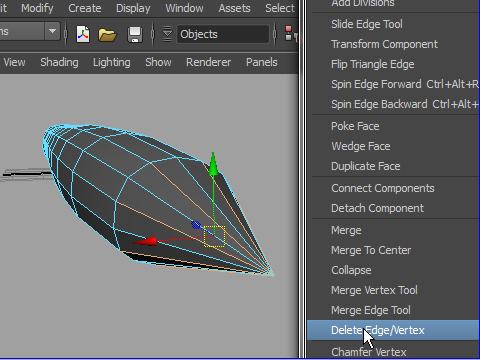
10. Avoid triangle shapes as possible. In character model always try clean square faces.
The tail has some triangle shapes.
To fix the problem select the edges like the picture above.
Then delete edges by using Edit Mesh > Delete Edge/vertices
三角形の面はなるべく避けましょう。キャラクターモデルはなるべく四角形のクリーンな面にします。
しっぽの先の部分の三角形の面を四角形になおしてみましょう。
まず図のようにエッジを一つおきにセレクトします。
次にEdit Mesh > Delete Edge/vertices でエッジをdelete します。
これで四角形の面になりました。
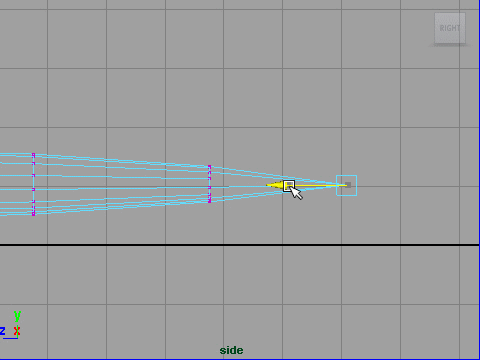
11. select the end vertex and push in to the body.
最後のポイントを移動します。
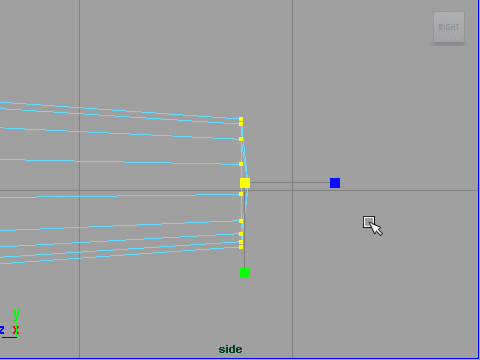
12. Taper down by changing scale.
スケールを変えて小さくします。
-4-