1. PacMan Mouth
1.
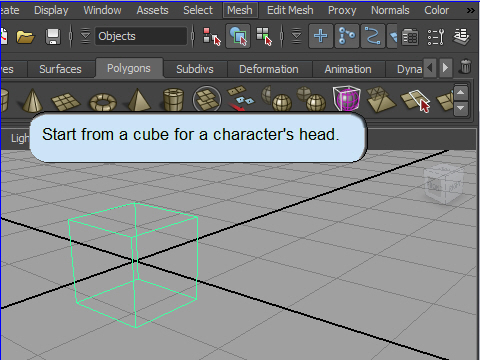
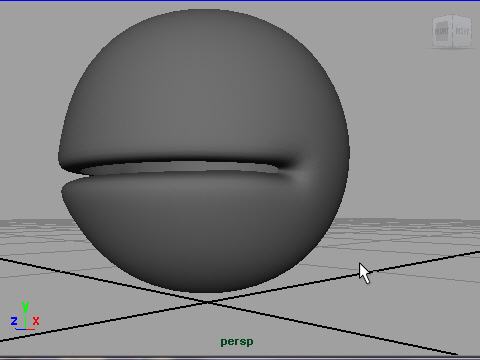
Always start from a cube for a character's head.
A sphere is not clean geometry for a character's head.
2.
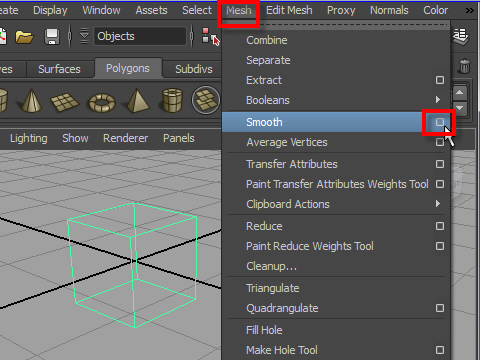
To subdivide the cube and make it round, go to Smooth option box.
3.
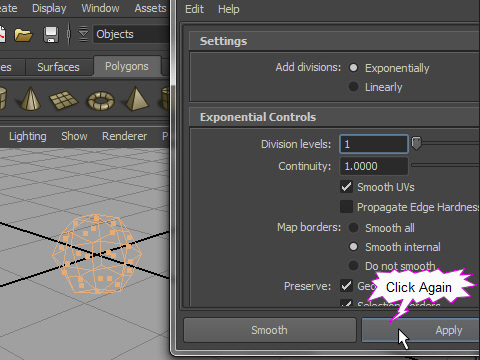
Click the Apply button twice.
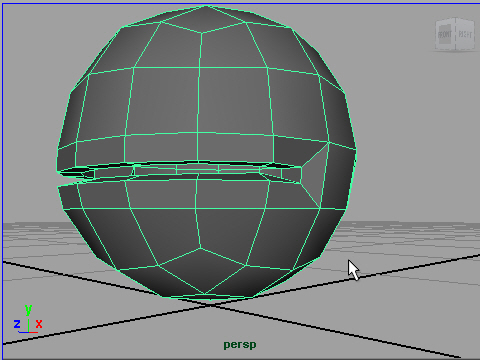
4.
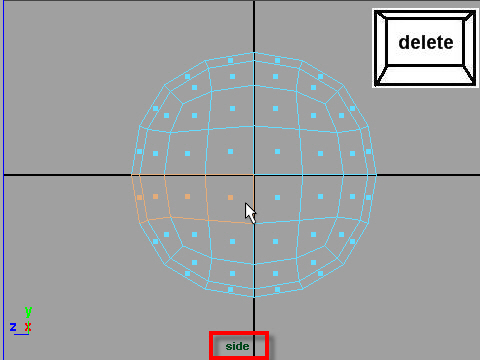
From the side view, delete the face on the mouth area.
See the picture above.
5.

To align the vertices straight, scale on Y.
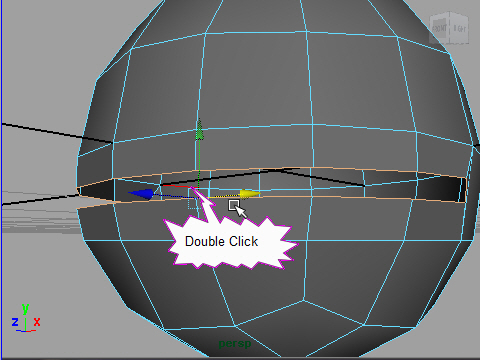
6.
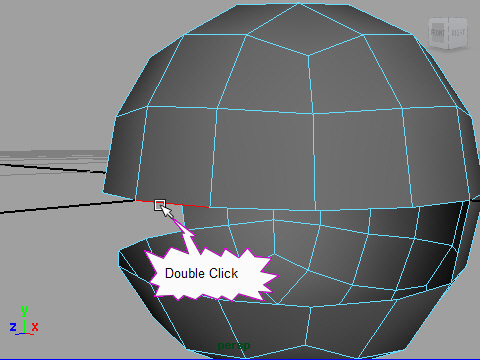
Double click and select the mouth edges.
7.
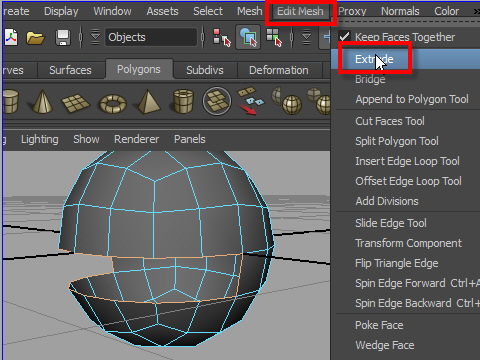
Extrude the edge.
8.
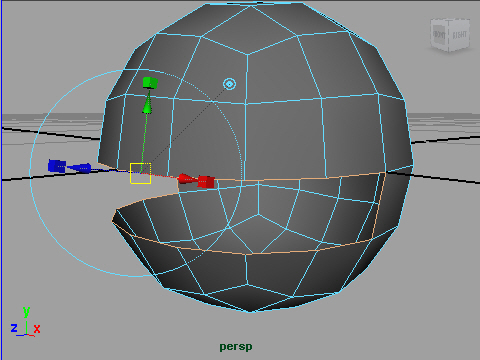
I want to change scale on Y.
However, I don't use the manipulator from Extrude tool to change scale.
It doesn't work well in this case.
Hit r on the keyboard, and get regular scale tool.
Hit r to get the scale tool or click the icon from the tool box on the left side of the window.
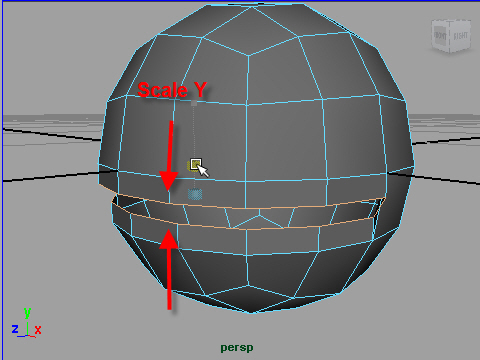
Scale on Y.
9.
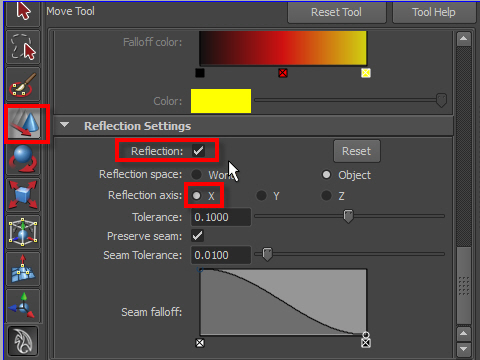
Turn on the Reflection.
If you move the right side vertex, the left side vertex move like a mirror, so the model keeps symmetric.
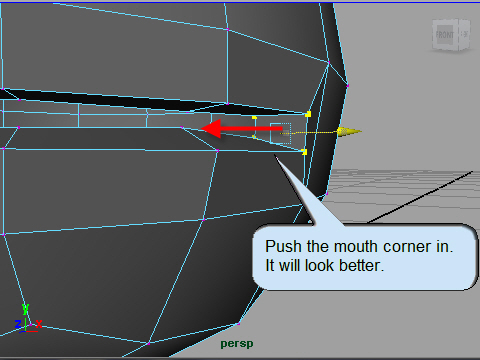
10.
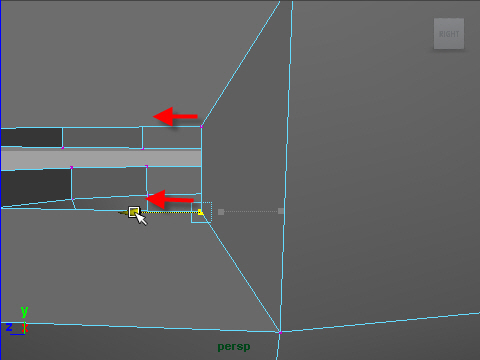
Move the vertices on the corner of the mouth forward. See the picture above.
11.
Select the mouth edges.
12.
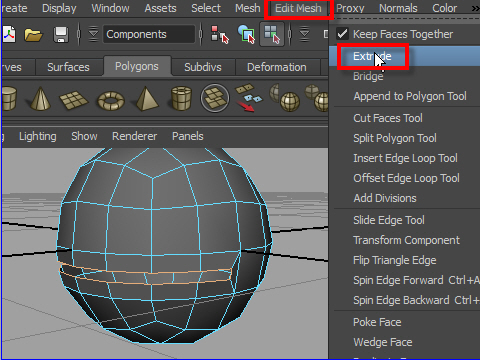
Now we are going to make a thickness.
Extrude again
13.
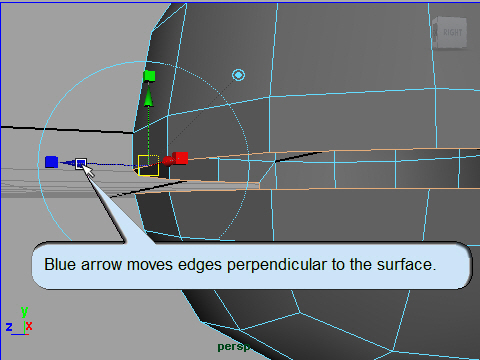
This time we are going to use the manipulator from the Extrude tool.
Click and drag the blue arrow inside.
14.
15.
16.

-1-